Showing posts with label Cards. Show all posts

Tuesday, March 15, 2011

Tuesday Already!

     Whew!  Where did the weekend go?  Oh well, it was crazy-busy-fun while it lasted.  I hope yours was great too!  I had a fabulous time at the crop I attended on Saturday, and they raised some money for a good cause.  Now I'm trying to catch up with real weekday life again.  But I can't complain too much - spring has sprung in my gardens, and new life is poking up through the soil.  I'm sooo ready for spring!

     For today, the rainy weather makes a perfect day for crafting (and cleaning, but that's no fun to talk about).  I have a stamped card to share with you.  I used a stamp from a set that my husband Mick and our grandson Dalton picked up for me at an auction.  Wasn't that sweet!
     Sorry the color doesn't show too well in the picture.  You can see that this paper is very sparkly, and the entire card is done in shades of brown and green.  These stamps are very detailed, and have very fine lines so the image ends up looking quite delicate.  What do you think?

     Well, my clean laundry is waiting for me, so I'd better get busy folding.  If I hurry, I might sneak in some craft time later!

Bye for now,
Anne
  

Thursday, March 10, 2011

Funky Chicken Thursday!

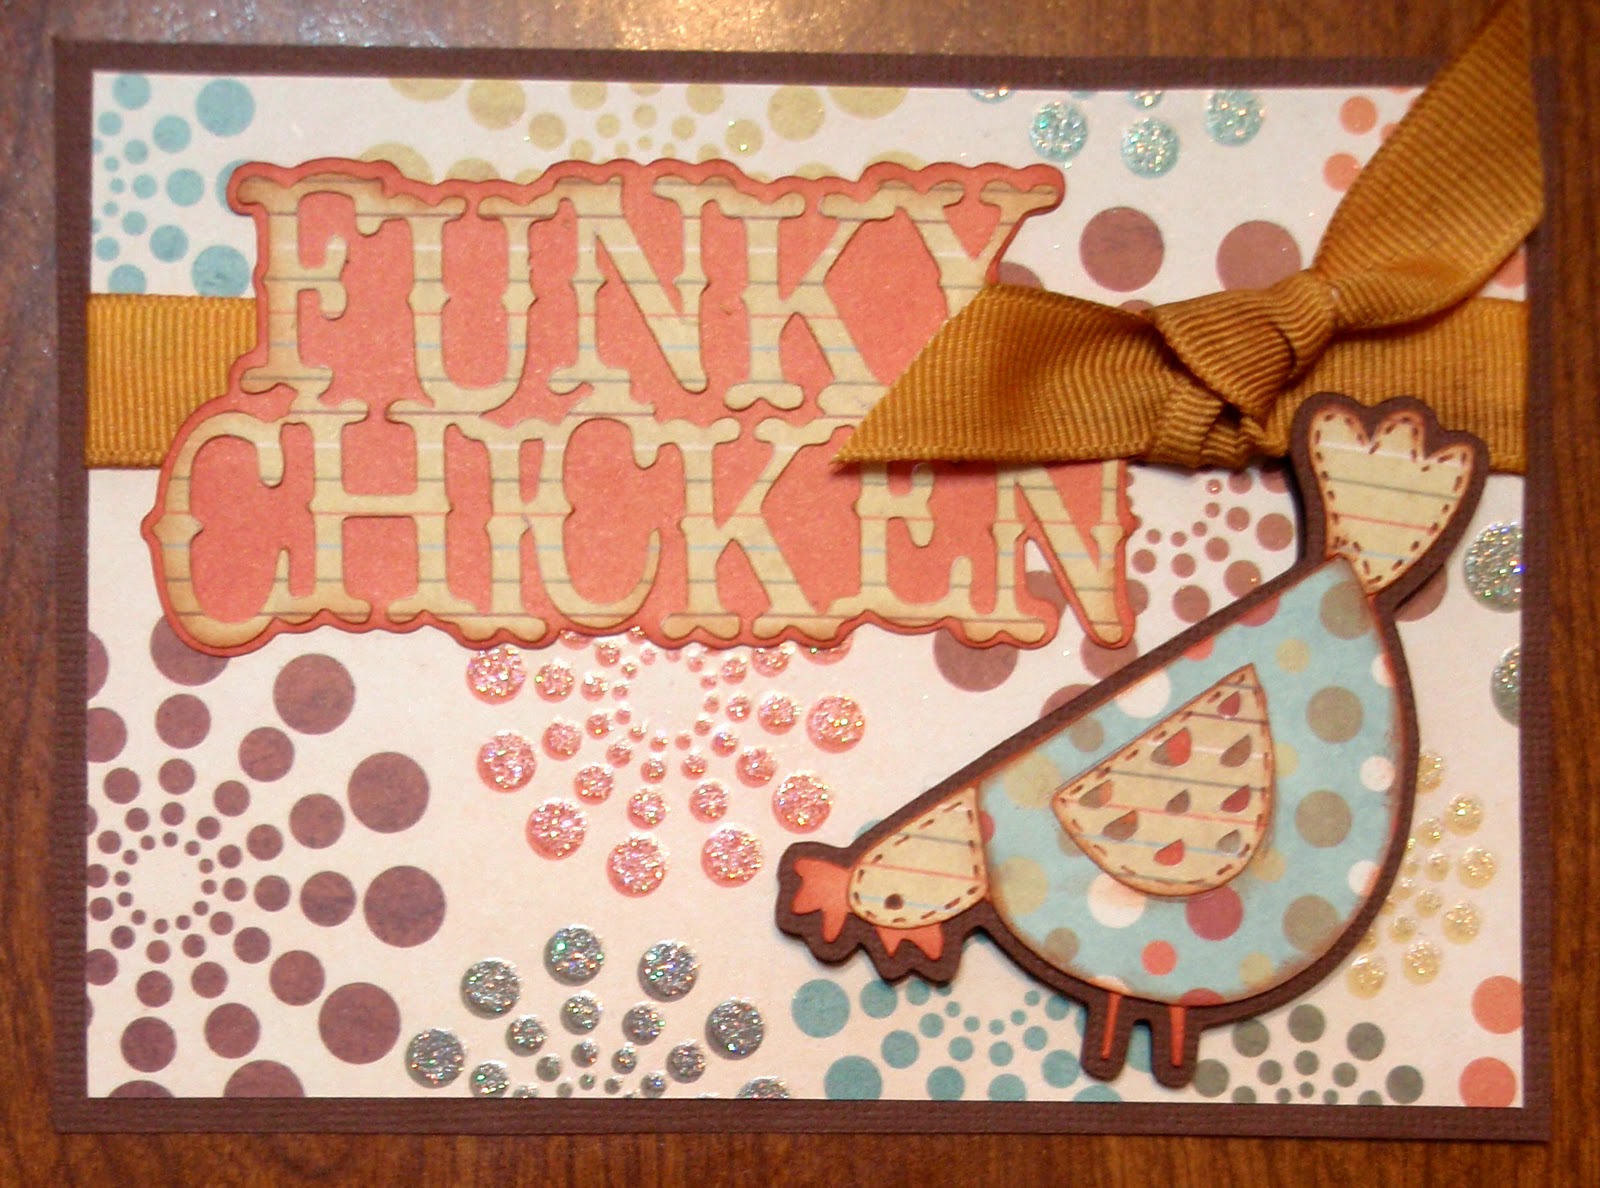
     Well, the weekend is getting closer.  It should be easy sailing from here to the weekend, so relax and start the fun now!  I have another cute chicken card to share with you, and hopefully it brings a smile to your face.
     This chicken image and the phrase, like yesterday's, are from the Country Life Cricut Cartridge.  I used the same papers for both cards, but this one I added a bit of ribbon.  Again, I cut the brown shadow twice so that I could put one shadow flat on the card and raise the other one on sticky foam.  I just love all the great images on this cartridge!

     That's all for today.  I have a full schedule today, so I have to run.  You have a fabulous day today! 
Bye for now,
Anne

Wednesday, March 9, 2011

Well, we've made it to Wednesday again!

      We've reached the middle of the week again.  It should get easier from here, so relax and enjoy!  In the meantime, check out this card that I made with the Country Life Cricut Cartridge.
     This is one of the cartridges that I don't have yet, but a friend of mine very sweetly let me borrow it.  I have been wanting this cartridge for a while, but after I saw all the cute images and phrases on it, now I know that I have to have it!  This card is one of a set of two chicken cards.  Isn't it cute?  So easy to put together!  I did add a little ink on the edges (of course), and some faux stitching in a couple of spots.  I also cut two of the brown chicken shadows so that I could place one flat on the card, and raise the other one on sticky foam for a little dimension.

     Well, that's all for today.  Don't forget to leave me a comment, and stop by again tomorrow.  

Bye for now,
Anne

Tuesday, March 8, 2011

A Birthday Card for Tuesday

     Hello again!  I hope you're having a great day.  I have another card to share with you.  Sometimes it can be hard to come up with a masculine birthday card, but this one would be perfect for a guy. 
     The tan mat was cut with a Nestabilities die in my Cuttlebug.  All the papers are from the same collection from S.E.I.  I added a little ink, some hemp, and a few buttons and the card was finished.  The end result is a beautiful card for a man or a woman.  Super easy!  I hope you like it.

Bye for now,
Anne

Friday, March 4, 2011

T.G.I.F.!

     Yeah!!  It's Friday!  I hope you have a fun weekend planned.  Mick and I are spending the evening with a group of friends (our trail riding buddies), and then tomorrow I get to go to a Scrapbook Crop.  Whoo-hoo!  All of this has put me in a horse/papercraft/thankful mood, so let's put that all together. 
     There we go!  A Thank You card with horses.  Just right for today!  The horses are stamped, as is the sentiment.  The scalloped oval I cut with a Nestabilities die and my Cuttlebug.  The flowers were a little too overwhelming at first, so I brushed a little ink over the surface.  That toned them down just a bit. 

     Well, that's it for today.  I hope that you like my simple little card.  Leave me a comment with any thoughts or ideas, I always love to read them!

Bye for now,
Anne

Thursday, March 3, 2011

Go Fish!

     Happy Thursday!  We're on the downhill slide, heading towards the weekend.  Yippee!  It's time to think about kicking back and relaxing for a few hours.  Maybe with a fishing pole....
     I just love the silhouette cuts on the A Child's Year Cricut cartridge.  This little fishing boy just makes me think of breezy summer days at the lake.  Come on summer! 
   
     The mat behind the boy is from a Nestabilities Die that I ran through my Cuttlebug.  Both the light and dark blue card stock is from DCWV, and has a white core.  A little sanding gives it a wonderfully worn look.  I used an EK Success border punch for the top of the "water", and added a button and a couple of brads.  Easy-peasy!

     Well, that's all for today.  Drop by tomorrow for another project to wind up the week.
Bye for now,
Anne

Wednesday, March 2, 2011

Gratitude for...everything!

     Do you ever feel like you just need to let someone know how grateful you are?  It may be for something big, or something small, or just for being who they are.  Whatever the reason, you don't have to get stuck in that same old "Thank You" rut.  Change it up a bit!  Find a new way to express your, well... gratitude!
     I found this gratitude stamp in a set of clear autumn stamps that I have.  I stamped it first in blue, and then slightly offset in brown.  This gave it a little bit of a shadow effect.  That is my favorite thing about clear stamps - you can see exactly where you are stamping.  Add a few buttons, round a corner or four, and tie on some ribbon.  Not too much to it, but it does get the point across!

     This card can be used at any time of the year, for a man or a woman.  Blues and browns together are universal!  Make a few up today, and let the people in your life know how you feel.  Express your gratitude!

Bye for now,
Anne 

Tuesday, March 1, 2011

Here Comes the Bride!

     It's starting to look like Spring is on it's way.  That means we can expect a flurry of April showers, May flowers, and June weddings.  Do you have all your cards ready?  You don't want to be caught throwing one together at the last minute.  Here is an idea for a card that you can use for a variety of occasions.  Bridal Showers, Weddings, Anniversaries, this one work for them all.  See what you think.
     This is the bride cut from the Paper Doll Dress Up Cricut Cartridge.  After cutting all the layers, I ran the brides gown through the Cuttlebug in the Tapestry embossing folder.  Next I used a fine tip glue to go over all the raised areas on the gown and the detail marks on the other pieces, and then sprinkled them with a fine glitter.  The background paper is from the DCWV Luxury Stack. 

      If you know the colors of the wedding, you can make the background paper match them, and you can also change the color of the brides hair to make it more personalized.  If the bride is a scrapbooker, use a repositionable adhesive to attach the bride to the background.  That way she can use the bride figure in her wedding scrapbooks.

     I hope you like this sparkly little bride.  Don't forget to leave me a comment to tell me what you think of this one.

Bye for now,
Anne

Monday, February 21, 2011

Monday Already?

     Where, oh where did the weekend go?  I can hardly believe that it is Monday already.  How was your weekend?  Did you get to spend any time crafting?  I hope so!  I had a great time Saturday at our Cricut Class.  We had a total of 16 adults, and one small assistant.  The afternoon went so fast that I didn't even have time to take pictures of everyone working with their bugs!  Maybe next time.

     Now to start a new week!  I have a new card to show you today.  You know that I like to save time, and paper.  This card is made from my scrap basket, again.  Love using those scraps!  It's like making a card for free.  You may recognise this butterfly cut.  I used this butterfly on the blue and green card that I shared with you a while back.  When I cut the blue and green butterfly, I also cut this pink and purple one.  When I find a cut that I like, I cut more than one at a time so they are ready when I need them.  Saves time, and I can put together a quick card when I need one.  A recipe box makes a great place to store the extra cuts until I need them.
     All three layers of the butterfly were cut at 2.75".  I used a Fiskars Border punch along the bottom of the polka-dotted paper, and drew some faux stitching on the butterfly with a white gelly roll pen.  I added a few white dots here and there for fun.  The word dream is from a Fiskars stamp set, and is heat embossed.  Add a bit of ribbon and this card is finished!

     Leave me a comment to let me know what you think of this one.  I always love reading comments!  I'll be back tomorrow with something new.  Come back by and see!

Bye for now,
Anne

Friday, February 18, 2011

Finally Friday!

     Good morning!

     Are you all ready for the weekend?  I hope so.  I can't wait for our Cricut Class Saturday afternoon!  I'm so excited!!  Ok, enough of that for now.  We have a card to look at!
     This fun card comes from the Once Upon a Princess Cricut cartridge.  This is the perfect cut for girls of all ages, on any day.  Who wouldn't want to be Queen for a Day?  Great for birthdays, anniversaries, or even just because.  There are so many great cuts on that cartridge.  If you haven't checked out the handbook, you really should.  You don't know what you're missing!

     Well, hate to rush, but I have to get back to work on that Cricut Class.  I have a busy weekend ahead, so I'll be back here Monday.  Stop by and say hello!

Bye for now,
Anne

Thursday, February 17, 2011

A Thank You for Thursday!

Good morning Thursday!

     I'm so thankful for the beautiful, warm, sunny weather!  What a change from last week.  The snow is melting, the ice is disappearing, and I'm in the mood for a thank you card!
     It is a very simple card, but sometimes a simple thank you is all that you need.  The blue tag with thank you is a cut from the Tie the Knot Cricut Cartridge, cut at 2.5".  I used my Gypsy to remove the words from the tag and cut it in white to back the blue tag.  The tag is raised on sticky foam with the ribbon running underneath, and mounted on beautiful printed paper from K and Company.  A little faux stitching with a white gel pen finished it off.

     Well, that's it!  Let me know what you think of it.  I always love to read comments about my creations, so be sure to leave some!  ;)

Bye for now,
Anne

Saturday, February 12, 2011

Blog Hop Entry

     Have you been following along on The Pink Stampers blog hop?  So many great projects!  The challenge was to create something using black with your favorite color.  My favorite colors are black, green, and blue, and I added a little cream to lighten it up. 
     This butterfly is cut from the Sentimentals Cricut Cartridge at 2.75 ".  I punched a few more holes with my Crop-a-dile to let more of the black show through the green.  The blue layer is raised on sticky foam to give it some depth.  I hope you like it!

     Now don't forget to check out all the fabulous projects in the blog hop!  Just go to The Pink Stamper to start the Blog Hop and see all the project entries.  Have fun!

 Bye for now,
Anne

Friday, February 11, 2011

A Lovey-dovey card!

 Happy Friday! 
      Pshew, I thought it would never get here!  I hope you've had a good week, and have great plans for the weekend.  Can you believe that Valentine's Day is just a few days away?  How did that happen?!?!  Anyway, in honor of this celebration of love, I thought that it was time for another love themed card.  This card could be used for a Valentine's card, a wedding card, or just any ol' "I Love You" type of occasion.
     That's right!  A love card without a spot of red or pink on it.  Crazy, I know.  But I kind of like the way this card turned out.  I wanted it to look like a pair of birds (doves?) sitting on a branch with the moon behind them.  Close enough.  So here are the details.

     The moon was cut from the George and Basic Shapes Cricut Cartridge at 3.5".  I used a printed card stock from the DCWV Luxury Stack, in kind of a shimmery champagne print.  Both the birds and branch silhouette and the True Love were cut from the Tie the Knot Cricut Cartridge at 1.75".  I used my Cricut Expression and my Gypsy so that I could put all the papers on the same mat and cut them at the same time, but you could easily cut them with any sized Cricut.

     After all the pieces were cut, it was easy to glue everything together.  I thought about popping the bird silhouette up on sticky foam, but I was afraid the branch ends would catch on the envelope and get torn up.  I played it safe and stuck the birds right on top of the moon.  A strip of ribbon to finish it off, and this card was done!  I hope you like it.

     Well, that's it for today.  I'll be back soon with another fun project.
Bye for now,
Anne


Thursday, February 10, 2011

Another Day, Another Card!

     Frosty, frosty, good morning!  How can it keep getting colder?  Brrrr!  I am so glad that I am hibernating with my crafts through this weather.  This is no time to be working outside!  But inside, it's a whole different story.

     I found a piece of paper in my scrap basket, and I knew I wanted to make a card with it.  But every idea I came up with would cover up the best part of the paper.  Sooo.... I decided to just use the paper as the card design.  It doesn't get any easier than this one!
     I used my 1" square punch to break down the flower part of the design on the paper.  I used a pen to draw fake stitches around each square, and then raised them up on sticky foam.  It took two of my EK Success border punches to get the look that I wanted for the bottom of the brown card stock, but they worked together well.  Then I tied a creamy yellow ribbon below the flower squares, and layered the whole combination on a blue card base. 

     This card was very fast and simple once I decided what I was doing.  Why don't you try something similar with one of your favorite scraps from your stash!  I'd love to see what you come up with.

Bye for now,
Anne

Wednesday, February 9, 2011

Wednesday is Card day!

     Hello again!

     It has been a couple of days since I shared a card with all of you.  Flowers, mini-albums, favor boxes.....psheww... all kinds of stuff!  So today we'll take it easy and just look at a simple card that I made this weekend.
     Aren't the colors nice and soothing?  I love the fabulous printed cardstock in the Linen Closet Stack from DCWV.  All of the papers on this card are from that same stack, and that makes it so easy to choose colors and patterns that work well together.  DCWV has already done all the matching work for us!

     Now on to the details.  The bird cut is from the Wall Decor and More Cricut Cartridge, cut at 3".  I ran the top layer of the bird through my Cuttlebug in an embossing folder.  (I believe it is called Houndstooth.)  After that I sanded it lightly so the white core of the DCWV card stock could show through.  I added a little green ink around the edges of the bird before gluing the two layers together.

     The mat behind the bird was cut with a Spellbinders die that I rolled through my Cuttlebug.  The tan strip was cut with a Martha Stewart border punch.  Those deep border punches are so versatile!  All the pieces except the bird were inked on the edges with a brownish tan ink from studio g.  I raised the bird on sticky foam to give the card a little more dimension.  Oh, I almost forgot!  I added another border punched strip inside the card, from the striped print.

     Well, hopefully this card gets you thinking about SPRING!  For now, try to stay warm.

Bye for now,
Anne

Friday, February 4, 2011

Another Fun Card Friday!

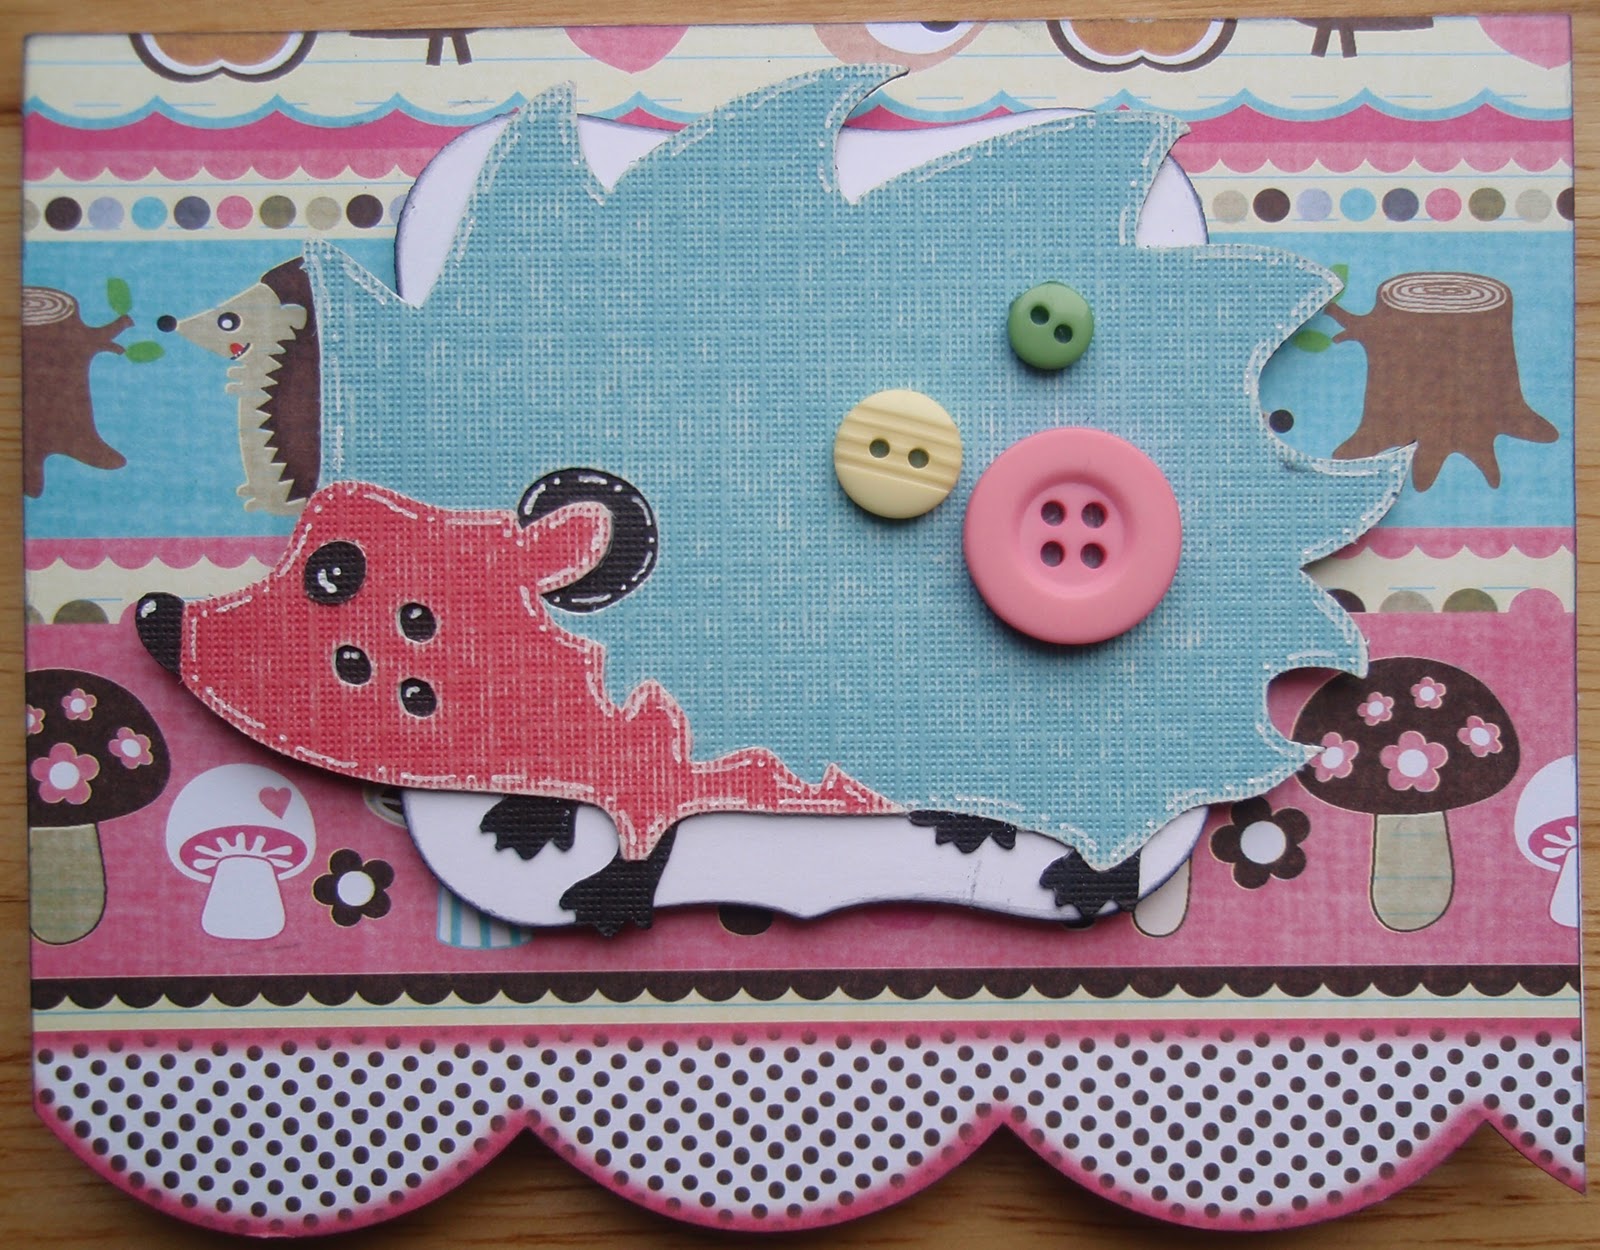
     Well, this snowy cold week is almost over!  I thought that another fun card would be a great way to end the week.  Isn't this little guy cute!  The hedgehog is from the Four-legged Friends Lite Cricut Cartridge.  He was cut at 3", first out of black cardstock.  Then the pink and aqua layers were cut from DCWV cardstock so that the white core would show through when it was sanded lightly.  The white mat under the hedgie is from a Spellbinders die that I rolled through my Cuttlebug.  The white mat with the hedgie are lifted up with sticky foam, and the doodling  is from a white gelly roll gel pen.  Add a few buttons, and that's it! 

     I hope you like my fun card for Friday!  I love to read comments about my creations, so please let me know what you think of them.  If you like what you see here, I hope you'll click the follow button at the top right of the post.

   Bye for now,
     Anne 

Wednesday, February 2, 2011

Gypsy Gatefold Card Challenge

     Hello everyone!  I hope you are all staying warm and toasty today.  I have decided to try another new thing!  I am going to try linking todays card to the blog challenge that inspired it.  We'll see how it goes...

     Anyway, todays card is a gate fold card that I designed on my Gypsy.  That is what the challenge is all about, so if you would like to join the challenge, or to see all of the other gatefold cards, just click on over to She's a Sassy Lady  blog.  There are some really cute cards there!

     My gatefold card is made with the Once Upon a Princess Cricut Cartridge.  I used my Gypsy to weld a doll body and  Buffalo Gal outfit onto the edge of a rectangle from George and Basic shapes.  That was my card base, and then I cut the pieces separately also for my layers.  I hope you like it! 
     The "Howdy!" is a stamp from a set by Clear Dollar Stamps.  I just love their Charlie Horse stamp sets! 

     Try out your own gatefold card if you get the chance.  They can be kind of fun, and the possibilities are endless!  Stop back by tomorrow and see what's new.

Bye for now,
Anne

Tuesday, February 1, 2011

Snow Day means Craft Day!

OOOHHHHH !  The weather outside is frightful,... but the crafts are so delightful.... so if you've no place to go....  
     Come on, sing along.  It's too awful to be outside, so we might as well stay in and craft the day away.  I hope that you all get some time for cardmaking today. To help get you in the spirit of things, I have a cute little owl card to share with you.
        Isn't it funny how so many cards have a love theme at this time of the year?  Hmmm....  Anyway, this little card could be used at any time of the year to let someone know how you feel.  The owl is from the Cricut Lite Hoot and Holler cartridge, cut at 3".  The layers are all very easy to assemble, and there are no tiny little pieces to lose.  The smallest cuts, actually, are the white part of the eyes.

    With the owl assembled, the rest of the card is a piece of cake.  Just punch or cut 9 one inch squares and arrange them in a 3 x 3 grid.  Glue them down and doodle around the edges.  While you're at it, might as well make a few doodles on the owl too.  Then use sticky foam strips to attach the owl on top of the grid, and stamp your sentiment on a scrap of paper and glue it below your owl.  Add a few buttons, more doodling around the stamped scrap, and the card front is done.  Inside I used the answering stamp "I do, that's who!" and then glued the card front onto a simple card base.

     This card is another great one to make from your scraps, because it uses a lot of bits and pieces.  Other than the 4.25" x 5.5" piece that I used for the background, the entire design is made from scraps smaller than 3.25" square.  I'll get that  scrap basket used up yet!

     Well, enjoy the weather where ever you are, and keep crafting if you can.  I'll have a bright and cheery project for you tomorrow, so make sure you stop back by.  You might want to make sure you click on the follow button up at the top right of the page.  That way I can make sure to keep you up to date!

     Thanks for stopping by,
     Anne

Monday, January 31, 2011

Monday Again!

     Happy Monday everyone!  I'm glad you decided to stop by and see what was going on around here.  Hopefully the weather isn't too bad where you are.  They are forecasting some nasty storms later today in our area, but let's forget all that!  Time seems to be flying by, and before we know it spring will have sprung.  So, with spring in mind, I have a St Patty's Day card for you!
     Somehow plaid just seemed right for this card!  I started this card a while back, and finally got it all together (well, the card anyway).  I didn't write down the details, but I believe the shamrock cut is from the Paper Dolls Dress Up Cartridge  for the Cricut, cut at 3.5", real dial size.  Whenever you are using the shapes from the paper doll cart by themselves, make sure to turn on the Real Dial Size button.  Otherwise the shape will be cut smaller so that it is proportional to a paper doll cut at the size you dialed up. I think this is my favorite all-time cartridge because of all the different shapes!  This really is a simple card, with just a little inking and pen-drawn stitching.  The border punch is by Martha Stewart Crafts.  The Irish blessing inside the card is printed from my computer.
    Leave me some comments and let me know what you think of this one.  I always love to read comments! 
Thanks for visiting my blog,
Anne

Saturday, January 29, 2011

So-Glad-It's Saturday!

     Good morning everyone!  I hope you have something fun (and crafty) planned for today.  I have another little card made from my scrap basket to show you.  I love using those scraps up!
     How about a Snowflake card for a snowy January Saturday!  I used my 1" square punch to make an inchie snow scene background.  Then I used the Winter Lace Seasonal Cartridge with my Expression to cut a 3.25" snowflake and it's shadow.  This is the very first snowflake on the cartridge, but you could really use any one the you like.  The shadow for the snowflake is the button directly under the snowflake button on this cartridge.
     The  border along the bottom is from a Martha Stewart punch, and the green brads are from my stash.  I used a pen to draw stitching around the inch squares and the top of the border strip.  You can't really tell in the picture, but I used glitter glue on the top of the snowflake for a little sparkle, and the raised it up with foam tape.  All that was left to do was to attach it to a card base.  That's all there is to it!
     Have a great weekend!  I'll be back in a day or two.
Bye for now,
Anne